Sunday, September 20, 2009
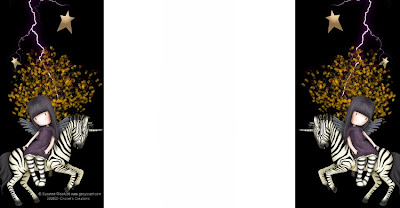
SW Dark Streak Background
I used the artwork of Suzanne Woolcott. The Zebra is one of my favorites from her collection. You will find her link on the sidebar.
Download Here
Templete by Catarific.
When uploading your background to photobucket be sure to click where it says options and select 1 megabyte file size, then upload.
How to add your Background.
Catarific has written a tutorial on Cutomizing You Blog.She explains it better than I ever could.So follow the link I have here and scroll down the page to you see Customizing Your Blog and read her instructions.Please leave her a thanks if you do use them.
**Make sure you remove your old background before you add your new background.
If you have any questions put them in the Shout Box.
SW Dark Streak Matching Header
I used the artwork of Suzanne Woolcott. The Zebra is one of my favorites from her collection. You will find her link on the sidebar.
Instead of downloading from 4share you can just click on the Header and it will take you to the proper size then you can right click and save as .
How to add your Header
1.Download the Header to your computer.
2.Upload to your Header to your photobucket account.
3.Copy your direct link.
4.Sign in your blog and click Customize.
5.Look for Navbar, underneath you will see the name of your Blog then click on Edit.
6.Click the button (On The Web). Paste your direct link in from your photobucket7.Click the button that says (Instead of tile and description.)
8.Then click Save.Your header should show in your blog now.
If you have any questions ask in the Shout Box.
Birds of a Feather Background!
Layout was created with Scrapkit at Sophisti-Scraps
Blog Templete by Catarific.
Download Background Here
When uploading your background to photobucket be sure to click where it says options and select 1 megabyte file size, then upload.
How to add your Background.
Catarific has written a tutorial on Cutomizing You Blog.She explains it better than I ever could.
So follow the link I have here and scroll down the page to you see Customizing Your Blog and read her instructions.Please leave her a thanks if you do use them.
**Make sure you remove your old background before you add your new background.
If you have any questions put them in the Shout Box.
Birds of a Feather Matching Header
Instead of downloading from 4share you can just click
on the Header and it will take you to the proper size
then you can right click and save as on your compter.
Layout was created with Scrapkit at Sophisti-Scraps
How to add your Header
1.Download the Header to your computer.
2.Upload to your Header to your photobucket account.
3.Copy your direct link.
4.Sign in your blog and click Customize.
5.Look for Navbar, underneath you will see the name of your Blog then click on Edit.
6.Click the button (On The Web). Paste your direct link in from your photobucket
7.Click the button that says (Instead of tile and description.)
8.Then click Save.Your header should show in your blog now.
If you have any questions ask in the Shout Box.
Friday, September 18, 2009
Suzanne Woolcott Fall Background
Artwork by Suzanne Woolcott
Background created using Scrapkit by Cinnamon Scraps.
Background Templete used created by Catarific.
Download Here
Please leave a message here or Shout Box if you download.
When uploading your background to photobucket be sure to click where it says options and select 1 megabyte file size, then upload.
How to add your Background.
Catarific has written a tutorial on Cutomizing You Blog.She explains it better than I ever could.
So follow the link I have here and scroll down the page to you see Customizing Your Blog and read her instructions.Please leave her a thanks if you do use them.
**Make sure you remove your old background before you add your new background.
If you have any questions put them in the Shout Box.
Suzanne Woolcott Fall Matching Header
Download Header Here!
Artwork by SuzanneWoolcott
Please leave a message you have downloaded. Thank you!
Layout created using Scrapkit by Cinnamon Srapes
How to add your Header
1.Download the Header to your computer.
2.Upload to your Header to your photobucket account.
3.Copy your direct link.
4.Sign in your blog and click Customize.
5.Look for Navbar, underneath you will see the name of your Blog then click on Edit.
6.Click the button (On The Web). Paste your direct link in from your photobucket
7.Click the button that says (Instead of tile and description.)
8.Then click Save.Your header should show in your blog now.
If you have any questions ask in the Shout Box.
Matching AppleGrape Header
Download Header Here!Please leave a message you have downloaded.Thank you!Layout created using Scrapkit by Scrapity Scraps.
How to add your Header
1.Download the Header to your computer.
2.Upload to your Header to your photobucket account.
3.Copy your direct link.
4.Sign in your blog and click Customize.
5.Look for Navbar, underneath you will see the name of your Blog then click on Edit.
6.Click the button (On The Web). Paste your direct link in from your photobucket
7.Click the button that says (Instead of tile and description.)
8.Then click Save.Your header should show in your blog now.
If you have any questions ask in the Shout Box.
Thursday, September 17, 2009
Pretty Flowers Background
Fall Background created using Scrapkit by Swheat CreationsBackground Templete used created by Catarific.Download Here
Please leave a message here or Shout Box if you download.When uploading your background to photobucket be sure to click where it says options and select 1 megabyte file size, then upload.
How to add your Background.
Catarific has written a tutorial on Cutomizing You Blog.
She explains it better than I ever could. So follow the link I have here and scroll down the page to you see Customizing Your Blog and read her instructions.
Please leave her a thanks if you do use them.
**Make sure you remove your old background before you add your new background.If you have any questions put them in the Shout Box.
Matching Pretty Flowers Header
Download Header Here!Please leave a message you have downloaded.Thank you!Layout created using Scrapkit by SwheatCreations.
How to add your Header
1.Download the Header to your computer.
2.Upload to your Header to your photobucket account.
3.Copy your direct link.
4.Sign in your blog and click Customize.
5.Look for Navbar, underneath you will see the name of your Blog then click on Edit.
6.Click the button (On The Web). Paste your direct link in from your photobucket
7.Click the button that says (Instead of tile and description.)
8.Then click Save.Your header should show in your blog now.
If you have any questions ask in the Shout Box.
Fall Background
Fall Background created using Scrapkit by Swheat Creations
Background Templete used created by Catarific.
Download Here
Please leave a message here or Shout Box if you download.
When uploading your background to photobucket be sure to click where it says options and select 1 megabyte file size, then upload.
How to add your Background.
Catarific has written a tutorial on Cutomizing You Blog. She explains it better than I ever could. So follow the link I have here and scroll down the page to you see Customizing Your Blog and read her instructions. Please leave her a thanks if you do use them.
**Make sure you remove your old background before you add your new background.
If you have any questions put them in the Shout Box.

Fall Matching Header
Download Header Here!
Please leave a message you have downloaded.
Thank you!
Layout created using Scrapkit by SwheatCreations.
How to add your Header
1.Download the Header to your computer.
2.Upload to your Header to your photobucket account.
3.Copy your direct link.
4.Sign in your blog and click Customize.
5.Look for Navbar, underneath you will see the name of your Blog then click on Edit.
6.Click the button (On The Web). Paste your direct link in from your photobucket
7.Click the button that says (Instead of tile and description.)
8.Then click Save.
Your header should show in your blog now.
If you have any questions ask in the Shout Box.
Subscribe to:
Posts (Atom)